Intro
Are your golf balls looking a little worse for wear? Maybe they’ve accumulated dirt and grime from multiple rounds on the course.
Not to worry – learning how to clean golf balls is a simple process that can have your equipment looking as good as new in no time.
In this guide, we’ll walk you through the steps to effectively clean your golf balls at home, whether they’re old, used, or you simply have a bulk of them to clean.

How to Clean Golf Balls: Step 1
Gather All Necessary Cleaning Supplies
Preparing to clean your golf balls starts with gathering the right supplies. This step is crucial and ensures that the cleaning process goes smoothly from start to finish.
Here’s what you’ll need:
- A Bucket or Large Container: Choose a container that’s big enough to comfortably hold all the golf balls you plan to clean. If you’re cleaning golf balls in bulk, make sure your container can accommodate them without overcrowding.
- Warm Soapy Water: Warm water is more effective at loosening dirt and grime than cold water. Mix in a squirt of dish soap or a gentle detergent to create a cleaning solution that’s tough on dirt but gentle on your golf balls. The temperature should be warm to the touch but not so hot that you can’t comfortably handle the water.
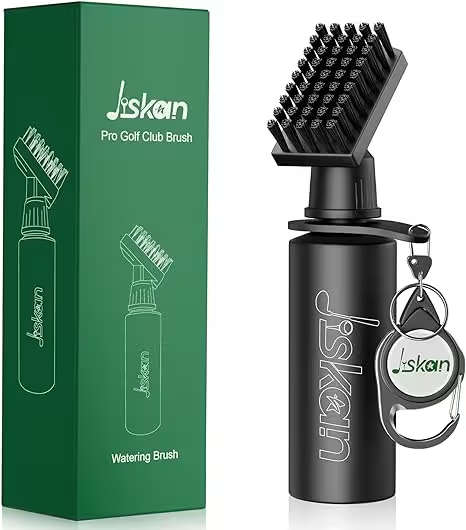
- Soft-Bristle Brush: A brush with soft bristles is ideal for this job. It’s strong enough to scrub away the dirt but gentle enough to avoid scratching or damaging the surface of the golf balls. An old toothbrush or a nail brush works perfectly for getting into the dimples and crevices where dirt likes to hide.
- Clean Water for Rinsing: After scrubbing, you’ll need fresh, clean water to rinse off the soap and loosened debris. Have another bucket or simply refill your container with clean water for this purpose. It’s important to thoroughly rinse the balls to prevent any soap residue from affecting their performance or appearance.
- Towel or Drying Rack: Finally, you’ll need a clean towel or a drying rack. This is for drying the golf balls after they’ve been cleaned and rinsed. A towel can be used to gently pat the golf balls dry, or you can lay them out on a drying rack or another clean towel to air dry.
By ensuring you have all these supplies on hand before you begin, you’re setting yourself up for a successful and efficient cleaning session.
This preparation step is a simple but important part of how to clean golf balls at home, especially if you’re tackling a large batch or cleaning old or used golf balls that may require a bit more TLC.
Now, with your supplies ready, you’re all set to dive into the cleaning process and get those golf balls looking pristine once again.
How to Clean Golf Balls: Step 2
Soak the Golf Balls in Warm Soapy Water
Immerse your golf balls into a world of cleanliness by starting with a warm, soapy bath.
This initial step is more than just a simple dunk; it’s an essential part of the cleaning process that works wonders on your golf balls.
Begin by filling your chosen bucket or large container with warm water.
The warmth of the water is a key ally in loosening the grip of dirt and grime that have settled on your golf balls during their adventures on the course.
Next, introduce a generous squirt of dish soap or a gentle detergent into the water.
This isn’t just any soap mix—it’s your golf balls’ spa treatment, designed to be tough on dirt but kind to the materials of your golf balls.
Stir gently to ensure the soap is evenly distributed throughout the water, creating a cleaning oasis for your golf balls.
Now, for the main event: Place your golf balls gently into the soapy mixture.
This isn’t a quick dip; give them a good 15-20 minutes to soak.
This soaking time is crucial as it allows the warm, soapy water to penetrate the dirt and grime that has built up in the dimples and on the surface of the balls.
It’s like letting dishes soak in the sink; the soap does the heavy lifting, breaking down the dirt and making your next step much easier.
As your golf balls are basking in their soapy bath, take this time to prepare for the next steps in the cleaning process.
Ensure your soft-bristle brush is at hand for the upcoming scrubbing session, and that you have fresh, clean water ready for rinsing.
This soak is the foundation of the cleaning process, setting the stage for a thorough and effective clean that will have your golf balls looking their best.
Remember, this soaking process is more than just a preliminary step; it’s an integral part of ensuring that your golf balls receive the thorough clean they deserve.
By allowing them to soak, you’re not only making the scrubbing process easier but also ensuring that the clean will be as effective as possible.
As they soak, imagine the rounds to come with these rejuvenated golf balls, each one gleaming as it flies down the fairway, ready for action thanks to your care and attention during this cleaning ritual.
How to Clean Golf Balls: Step 3
Scrub Each Golf Ball with a Soft-Bristle Brush
Once your golf balls have enjoyed a thorough soak in their warm, soapy bath, it’s time for a little hands-on action to get them sparkling.
Armed with your soft-bristle brush—whether it’s an old toothbrush that’s found a new lease on life or a gentle nail brush—prepare to gently yet effectively tackle the remaining dirt and grime that’s clinging to your golf balls.
Approach this task with the care of an artist, treating each golf ball as if it’s your canvas.
The soaking process has already done the heavy lifting, loosifying the dirt embedded in the dimples and surface.
Now, your job is to meticulously remove what’s left.
Begin by picking up a golf ball and inspecting it for any particularly stubborn spots or areas that seem to be holding onto dirt.
Apply a bit of elbow grease to these areas, but remember, the key word here is ‘gentle’.
The aim is to preserve the integrity and appearance of the ball, so avoid harsh scrubbing.
Work your way around the ball in a systematic manner, ensuring no dimple is left unchecked.
The soft bristles of your brush are perfect for getting into those tiny nooks and crannies, dislodging dirt without scratching the surface.
You may find it helpful to occasionally dip the brush back into the soapy water to reapply suds for additional cleaning power on those tougher spots.
As you scrub each ball, think of this as not just a cleaning task, but as an act of preservation for your beloved golf balls, allowing them to serve you well for many games to come.
This attention to detail during the scrubbing process is what makes all the difference, transforming a collection of used or old golf balls back into a proud fleet ready to grace the fairways.
Rotate the ball as you work, ensuring every inch receives your careful attention.
The satisfaction of watching each ball transform from grimy to gleaming is a reward in itself, a testament to the effectiveness of your efforts and the simple, yet vital, process of maintaining your golf equipment.
Once you’ve finished scrubbing, the ball should look noticeably cleaner, and you’ll feel a sense of accomplishment knowing you’re contributing to the longevity and performance of your golf balls.
With the scrubbing complete, you’re ready to move on to the next step in the cleaning process, bringing you one step closer to having golf balls that not only perform better but also reflect your dedication to the sport.
How to Clean Golf Balls: Step 4
Rinse the Golf Balls Thoroughly with Clean Water
The adventure of scrubbing has left your golf balls soap-laden and in dire need of a refreshing rinse.
This step is crucial, acting as the bridge between a thorough cleanse and the moment your golf balls are ready to dazzle on the course again.
Transitioning from scrubbing to rinsing, it’s important to ensure all traces of soap are washed away, as residual suds can affect the balls’ performance and appearance.
Begin this phase by preparing a new sanctuary of cleanliness: fill a clean bucket or your sink with fresh, cool water.
This will be the rinsing haven where your golf balls will shed their soapy coats and emerge clean and clear.
Gently introduce the scrubbed golf balls into the water, taking care not to overcrowd them.
This is their final spa treatment, so give them space to bask in the cleanliness.
With a gentle hand, stir the golf balls in the water, allowing the motion to dislodge any remaining suds clinging to their surfaces.
Observe the water closely; you might notice it clouding with the remnants of your cleaning efforts.
This is a good sign, indicating that the soap is leaving the golf balls and joining the water.
Should the water become too soapy, don’t hesitate to replace it with fresh, clean water and continue the rinse.
This might require a few changes of water, but patience here ensures your golf balls will be impeccably clean.
As you rinse each golf ball, envision the clean slate you’re providing them.
Each swirl in the water removes the last bits of their previous outings, preparing them for the next game.
This rinse is not just a step in the cleaning process; it’s a renewal, offering your golf balls a fresh start.
Take your time during this step, ensuring each ball is freed from soapiness.
This meticulous rinse is the key to ensuring that when the golf balls finally meet the drying towel or rack, they are in their purest state, free from any remnants of their cleaning journey.
This attention to detail during the rinse phase underscores your commitment to maintaining your golf gear in top condition, setting you up for success on the course.
How to Clean Golf Balls: Step 5
Dry the Golf Balls Completely Before Use
Arriving at the drying stage signifies that you’re nearing the finish line of your golf ball cleaning journey.
This step, while seemingly straightforward, holds its own importance in the restoration of your golf balls to their former glory.
Proper drying not only prepares them for their next game but also prevents any unwanted moisture from compromising their quality and performance.
To begin, you have two efficient drying methods at your disposal.
The first option is to air dry your golf balls.
This method involves laying them out on a clean, dry towel or setting them atop a drying rack.
Opt for a well-ventilated area away from direct sunlight to facilitate even drying.
Spreading the golf balls out ensures each one receives ample air exposure, speeding up the drying process without the risk of water spots or residual moisture.
The second method involves using a towel to pat the golf balls dry gently.
This approach offers immediate results and allows you to inspect each ball as you go, ensuring they’re not only dry but also free from any missed spots of dirt or debris.
When choosing a towel, opt for one that is soft and absorbent, minimizing the effort needed on your part while maximizing efficiency.
Whichever method you choose, patience is key. If opting to air dry, periodically check on your golf balls to assess their drying progress.
Should you choose the towel-drying method, take the time to gently rotate and pat each ball until you’re confident it’s thoroughly dry.
This drying phase is more than just a final step; it’s an act of preservation and care for your golf equipment.
Dry golf balls are not only aesthetically pleasing but also perform better, offering a truer flight and more consistent game.
By ensuring each golf ball is completely dry before storage or use, you’re investing in the longevity of your equipment and the quality of your game.
Remember, the effort you put into cleaning and drying your golf balls reflects your dedication to the sport.
It’s a small task that yields big rewards, not only in the appearance of your golf balls but also in their performance.
So, take your time, dry them thoroughly, and take pride in knowing you’re setting yourself up for success on the course.


